
Monitoring is the only way to assess what is in your collections.
There are no hard and fast rules on how to monitor for pests. Some institutions contract out their pest monitoring, others find they are better able to evaluate their activity by monitoring in-house. A combination of the two can also be used. The type of monitor or trap, distribution and placement will depend, in part, on whether you are trying to monitor general trends and activity, or to pinpoint the location of a specific problem.
The number of monitoring traps can be adjusted to suit collections needs over time based on findings or pinpointing problems. Ultimately, having a number of traps that can realistically be checked on a regular schedule is better than more traps than can be accommodate by staff time.
Insect monitor traps are not sufficient for exclusionary measures or as a solution to a pest problem, but are a way to help pinpoint a problem or alert you to things in your collections spaces.
Choosing Monitor Traps to Suit Your Needs
[decision tree coming]
Monitor Placement Scenarios
Traps should be placed inside every building, area, and room where your collection is stored. The total number of traps to deploy is not linked to square footage of the space; there is no easy formula to use. Instead, you need to analyze the architecture of the room, how it is used and what it stores. Invertebrates tend to walk along walls and edges. It is vital to keep in mind that the number of monitor traps should be limited to how many you will check on a regular basis, whether that is monthly, every other month, or quarterly. Monitor traps are for use in learning and analyzing what insects you may have in your storage spaces, not as exclusionary pest control.
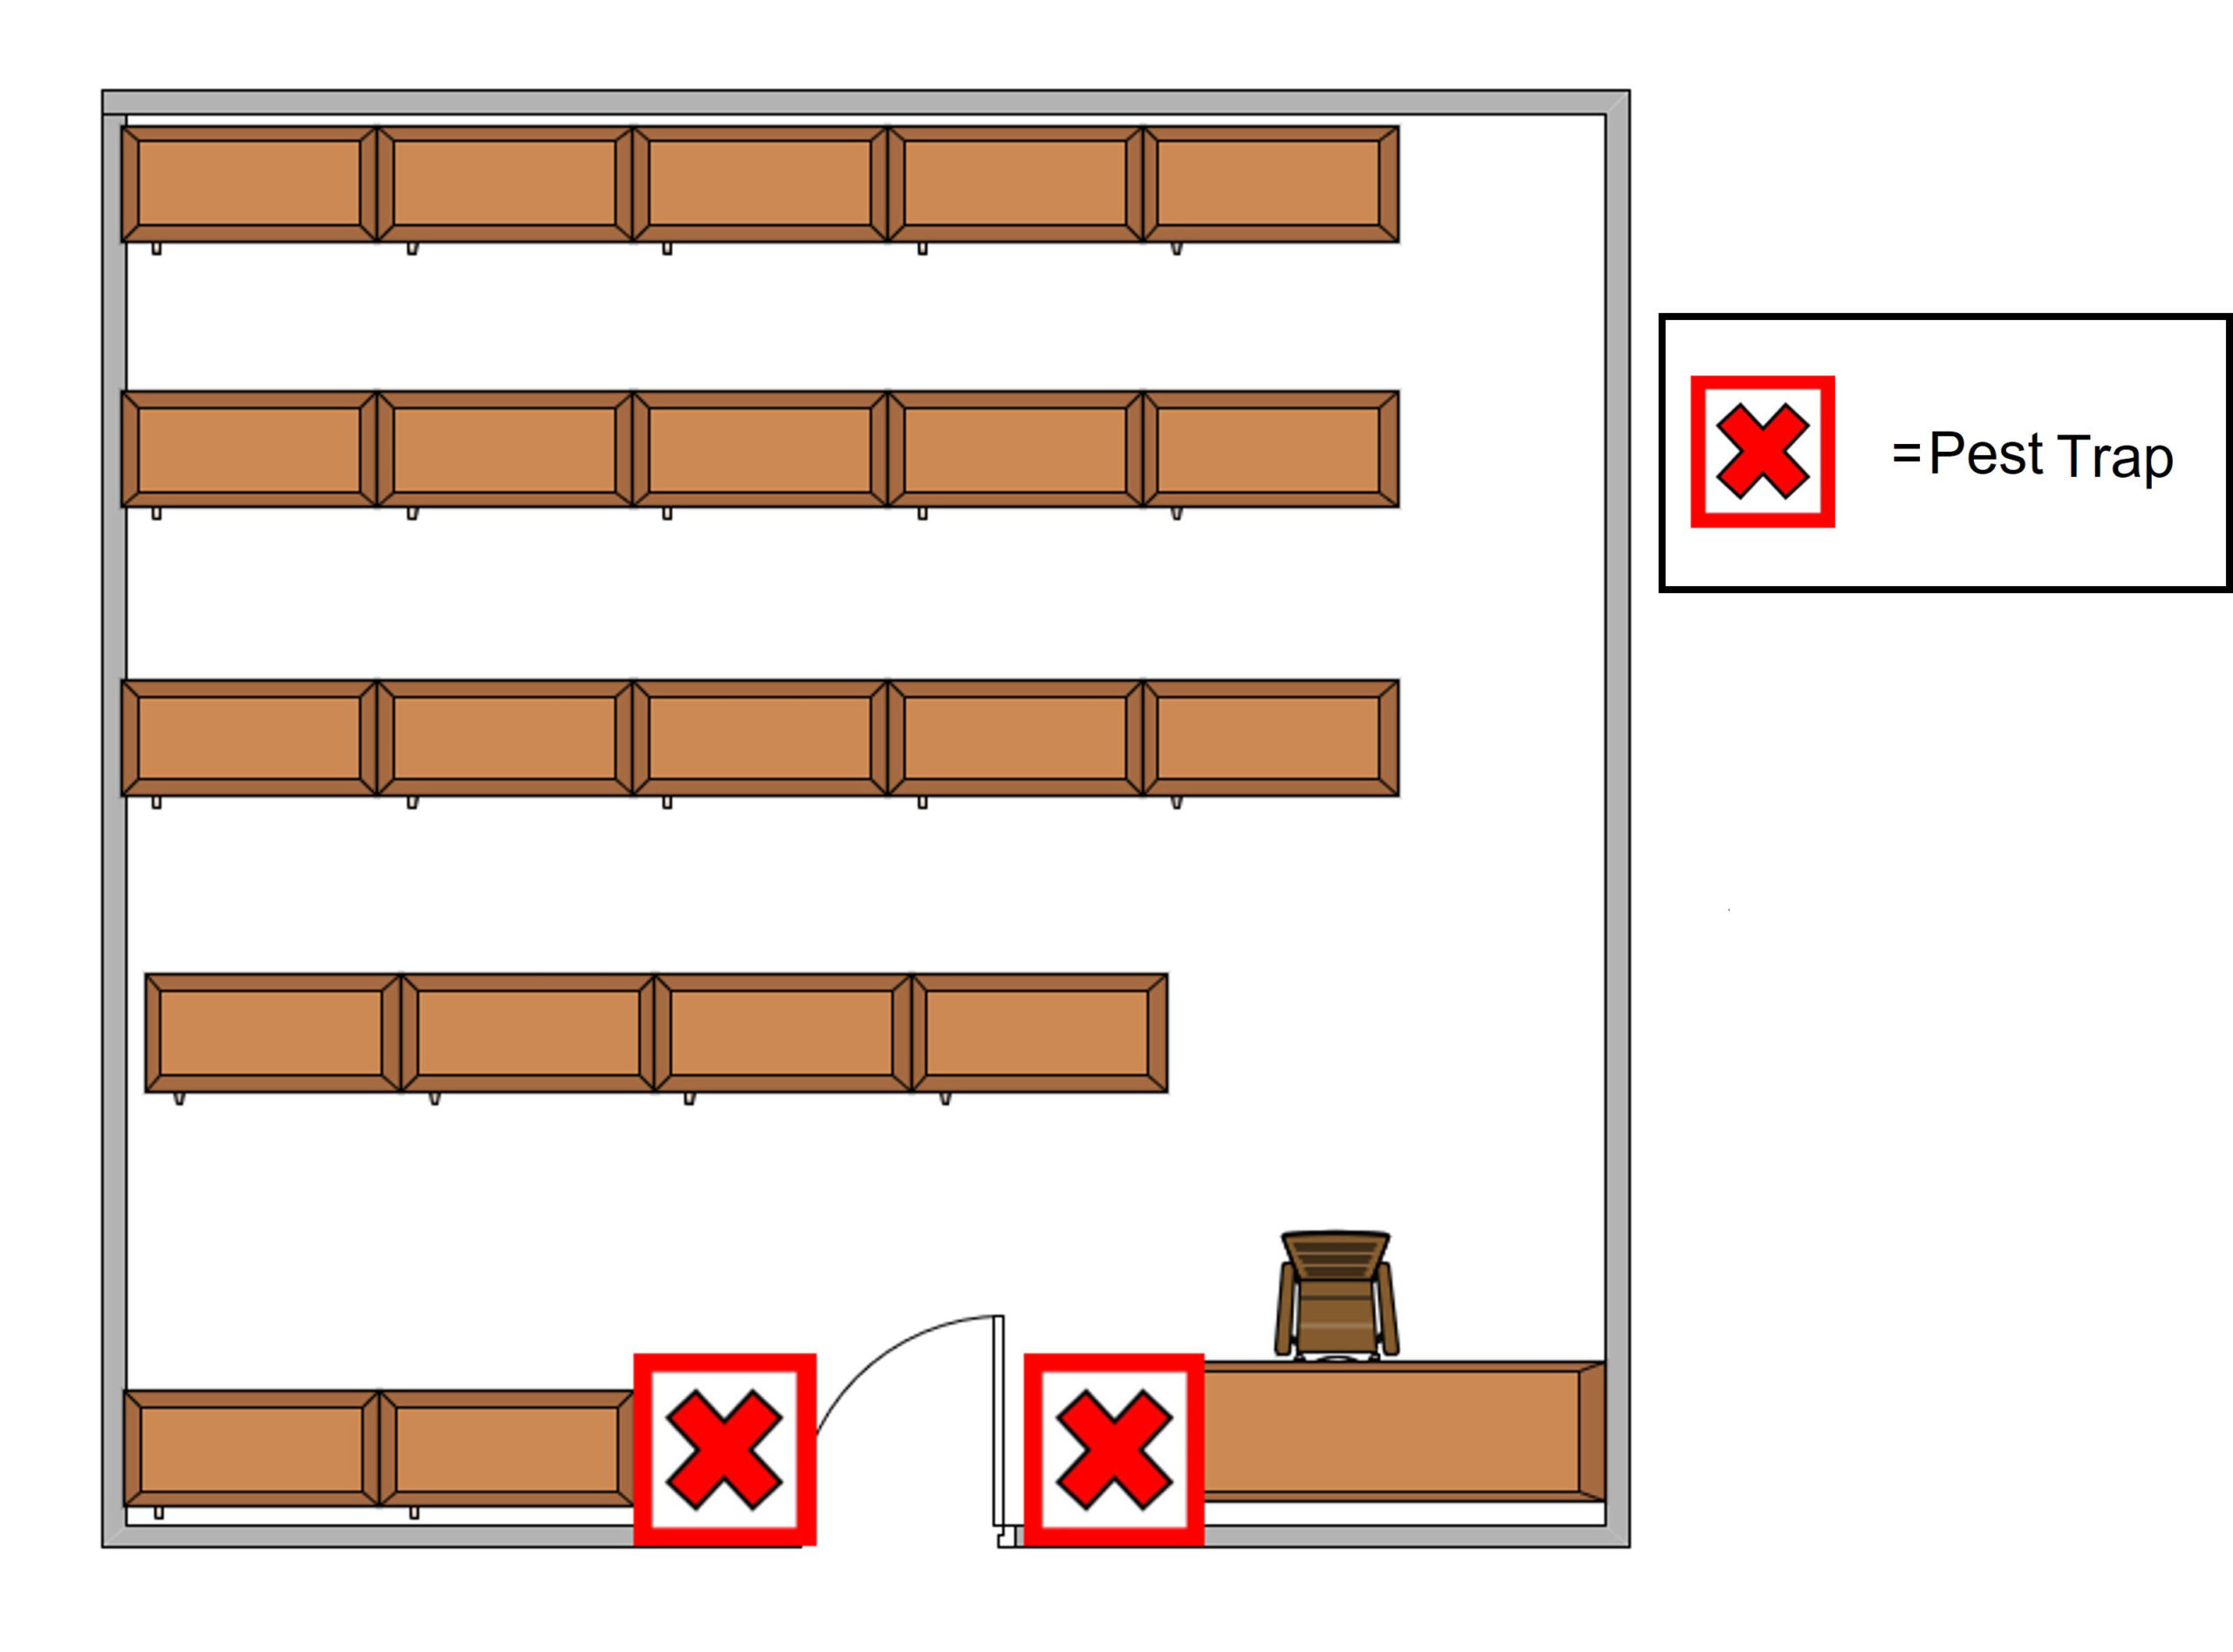
Blunder Trap Placement Scenarios:
Simple – No sink, one door, cabinets and painting racks.
This room will begin with only 2 traps, one on either side of the entry door against the wall.
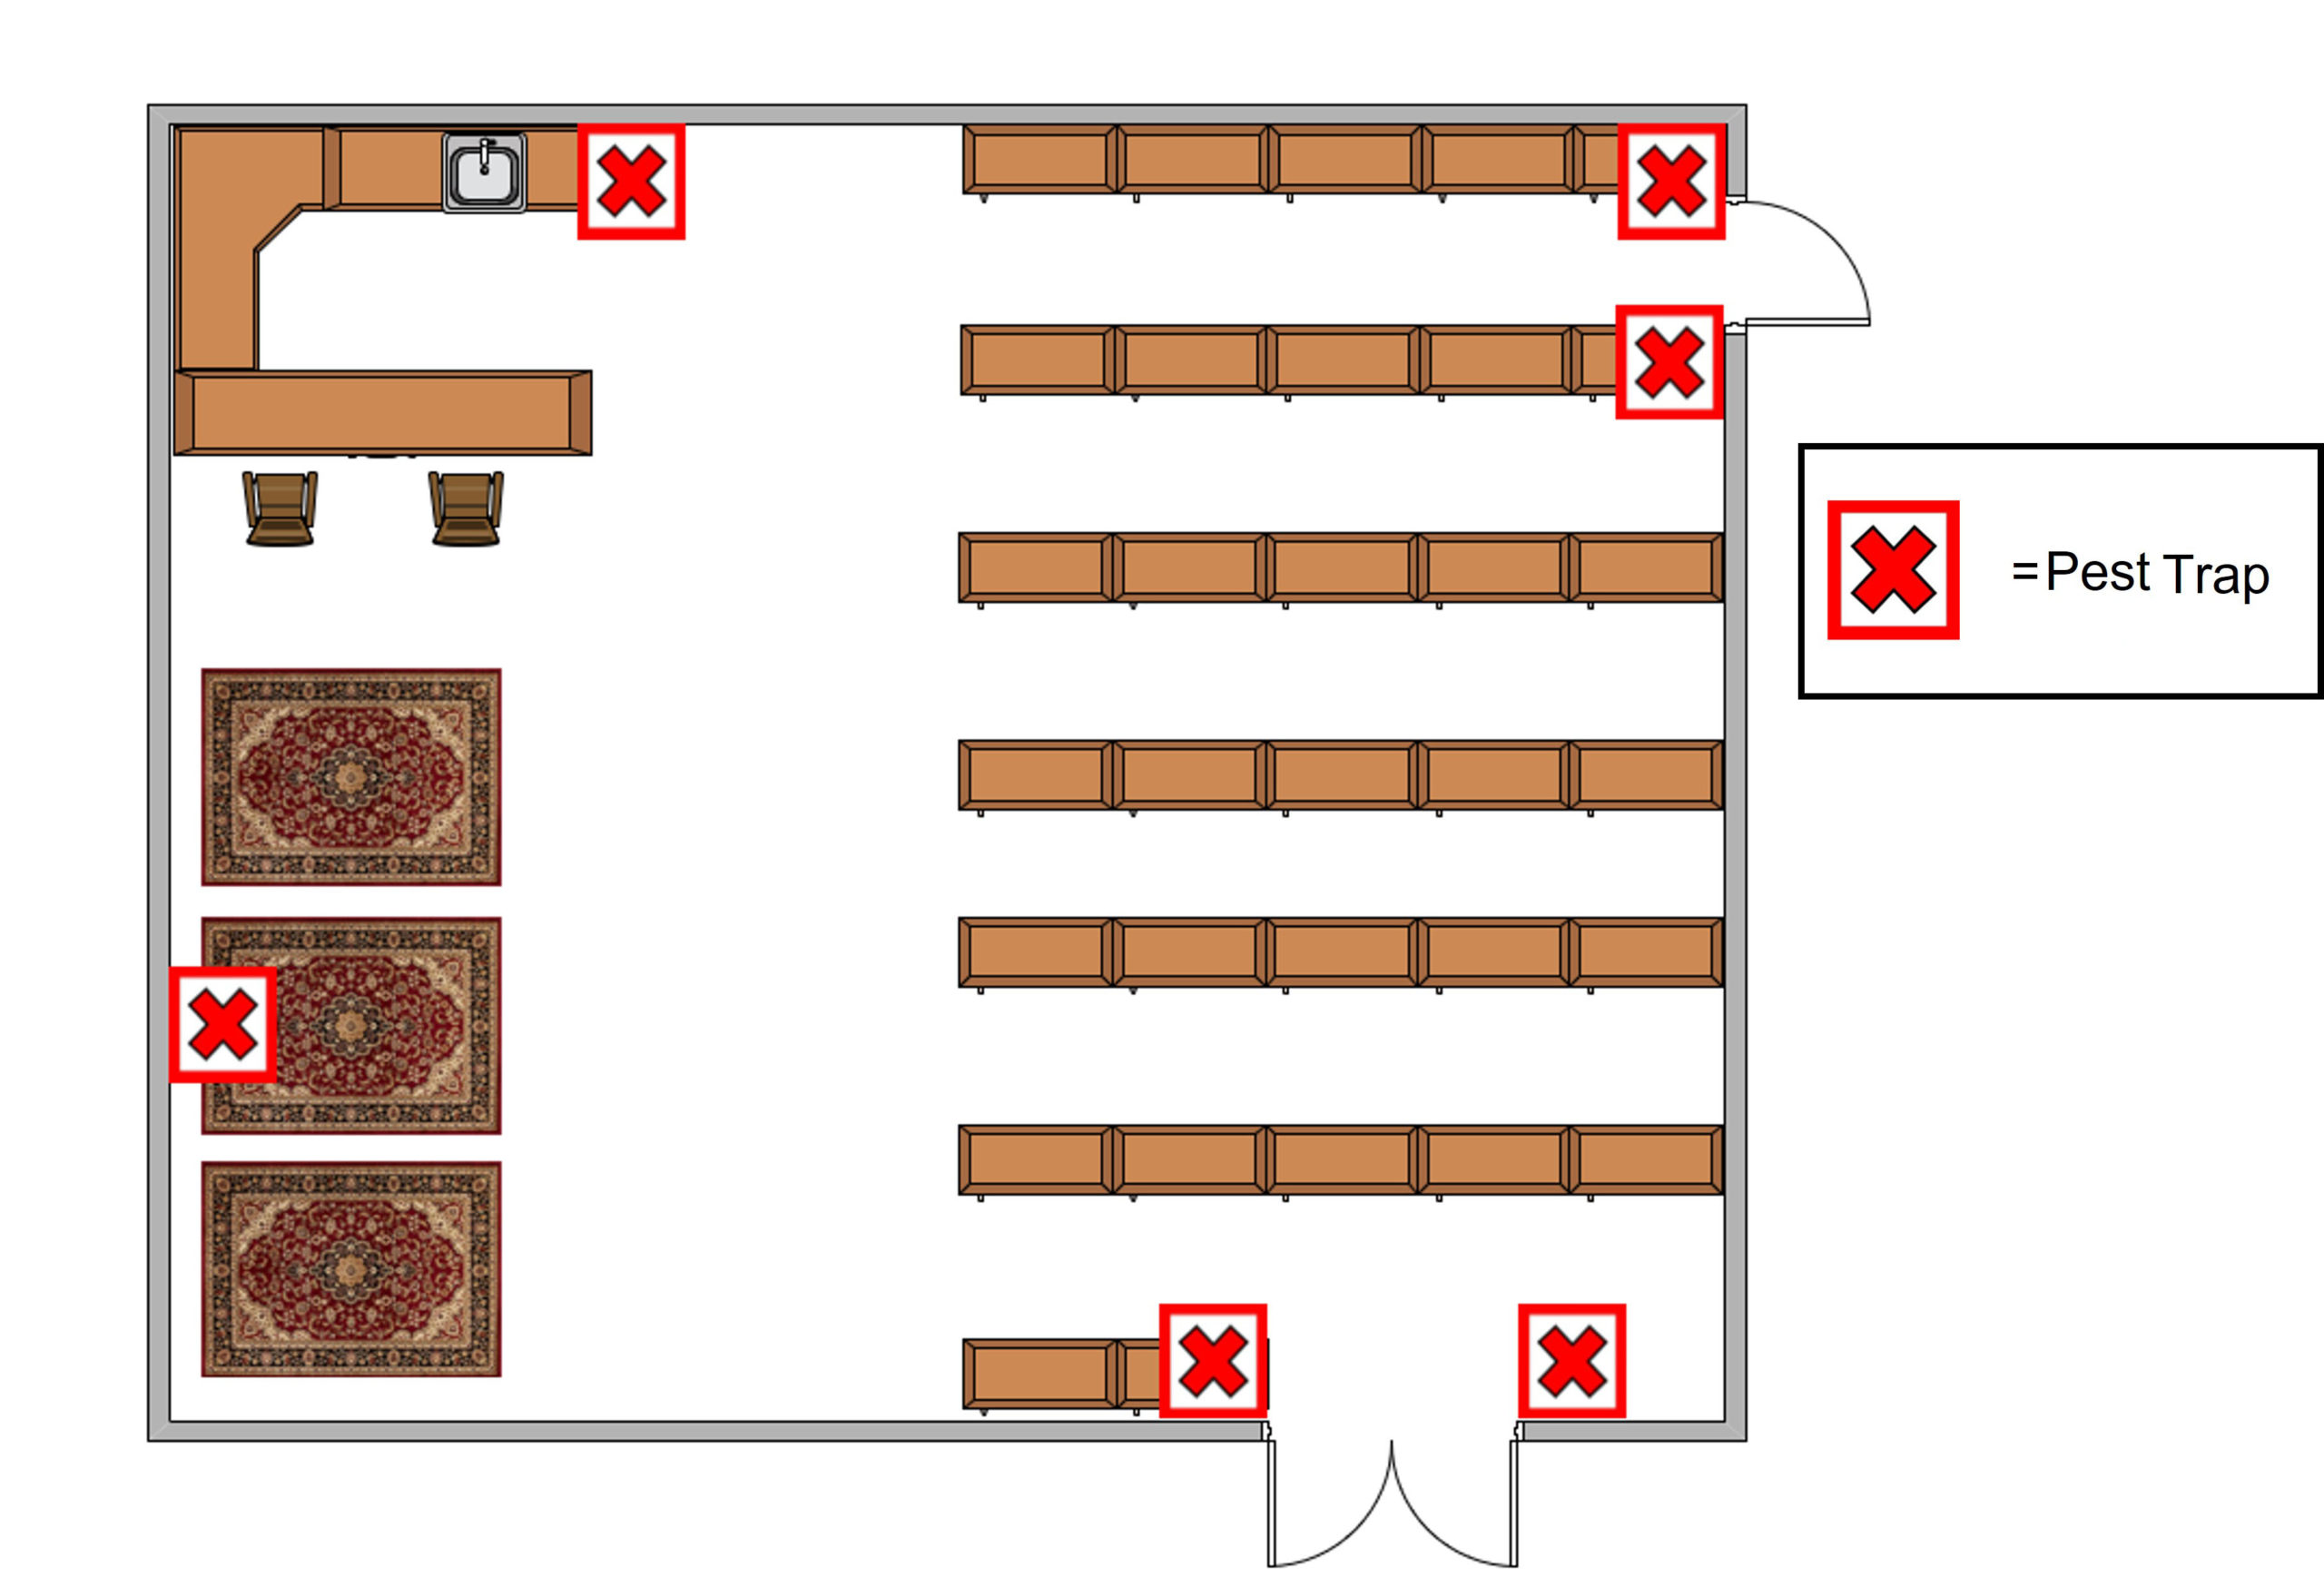
Average – Some high risk objects with feathers, wool or taxidermy, a sink, 2 doors.
This room will require more traps as you would add 1 or more in each high-risk zone, 1 by the sink, and 1 on either side of each entry door. A pheromone trap and/or moth trap may also be deployed near the high risk objects.
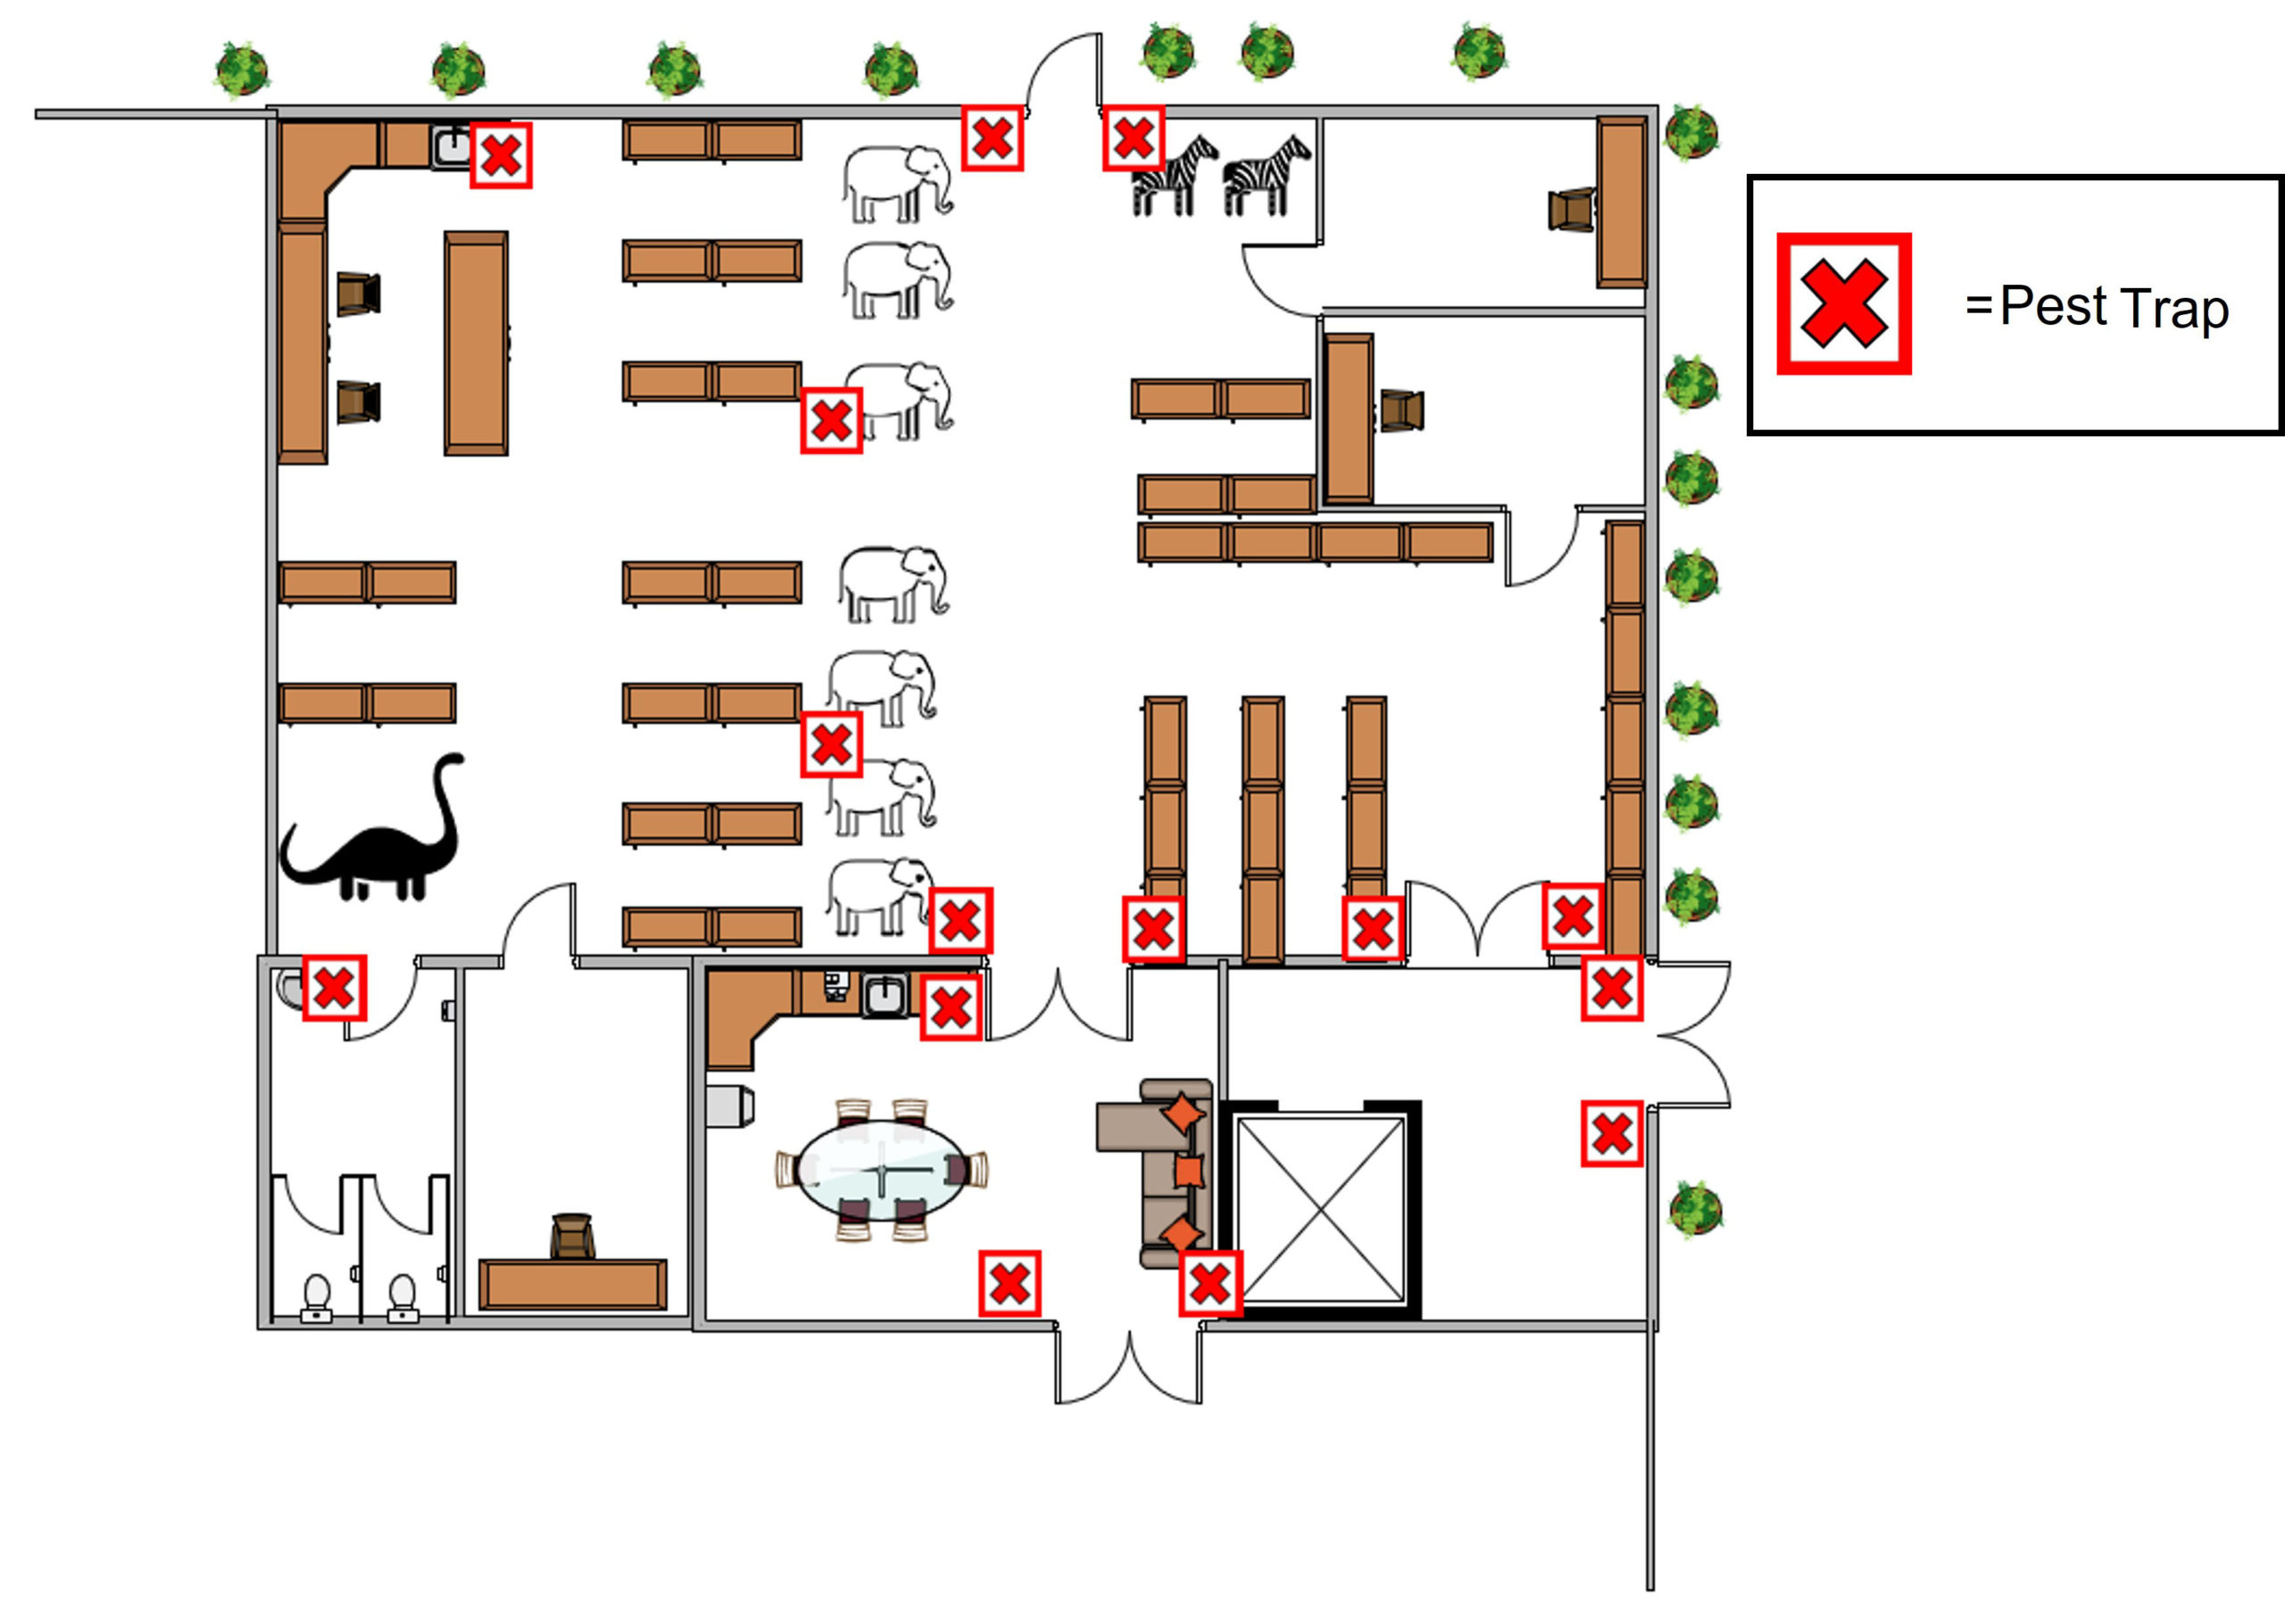
Complex – Elevator, near a kitchen or break room with drains, multiple offices, cabinets, a variety of objects and entrance and exit doors.
This room will require even more traps. High risk objects zones should be trapped as well as the entrance and exit doors. The walkway or doors to the kitchen should be trapped on both sides, as well as the elevator. You may pass on the offices unless they have shown building envelope issues.
Trap Checking Strategies
Monitor traps are only effective in helping protect your collections if they are checked on a regular schedule and that information is recorded. Different temporal strategies in checking are deployed based on collections risks, goals for data analysis, and availability of staff time. Common monitor trap checking schedules are monthly, every two months, and quarterly. More frequent checking may occur during infestation events or for other specific needs, but this would fall outside of a regular schedule.
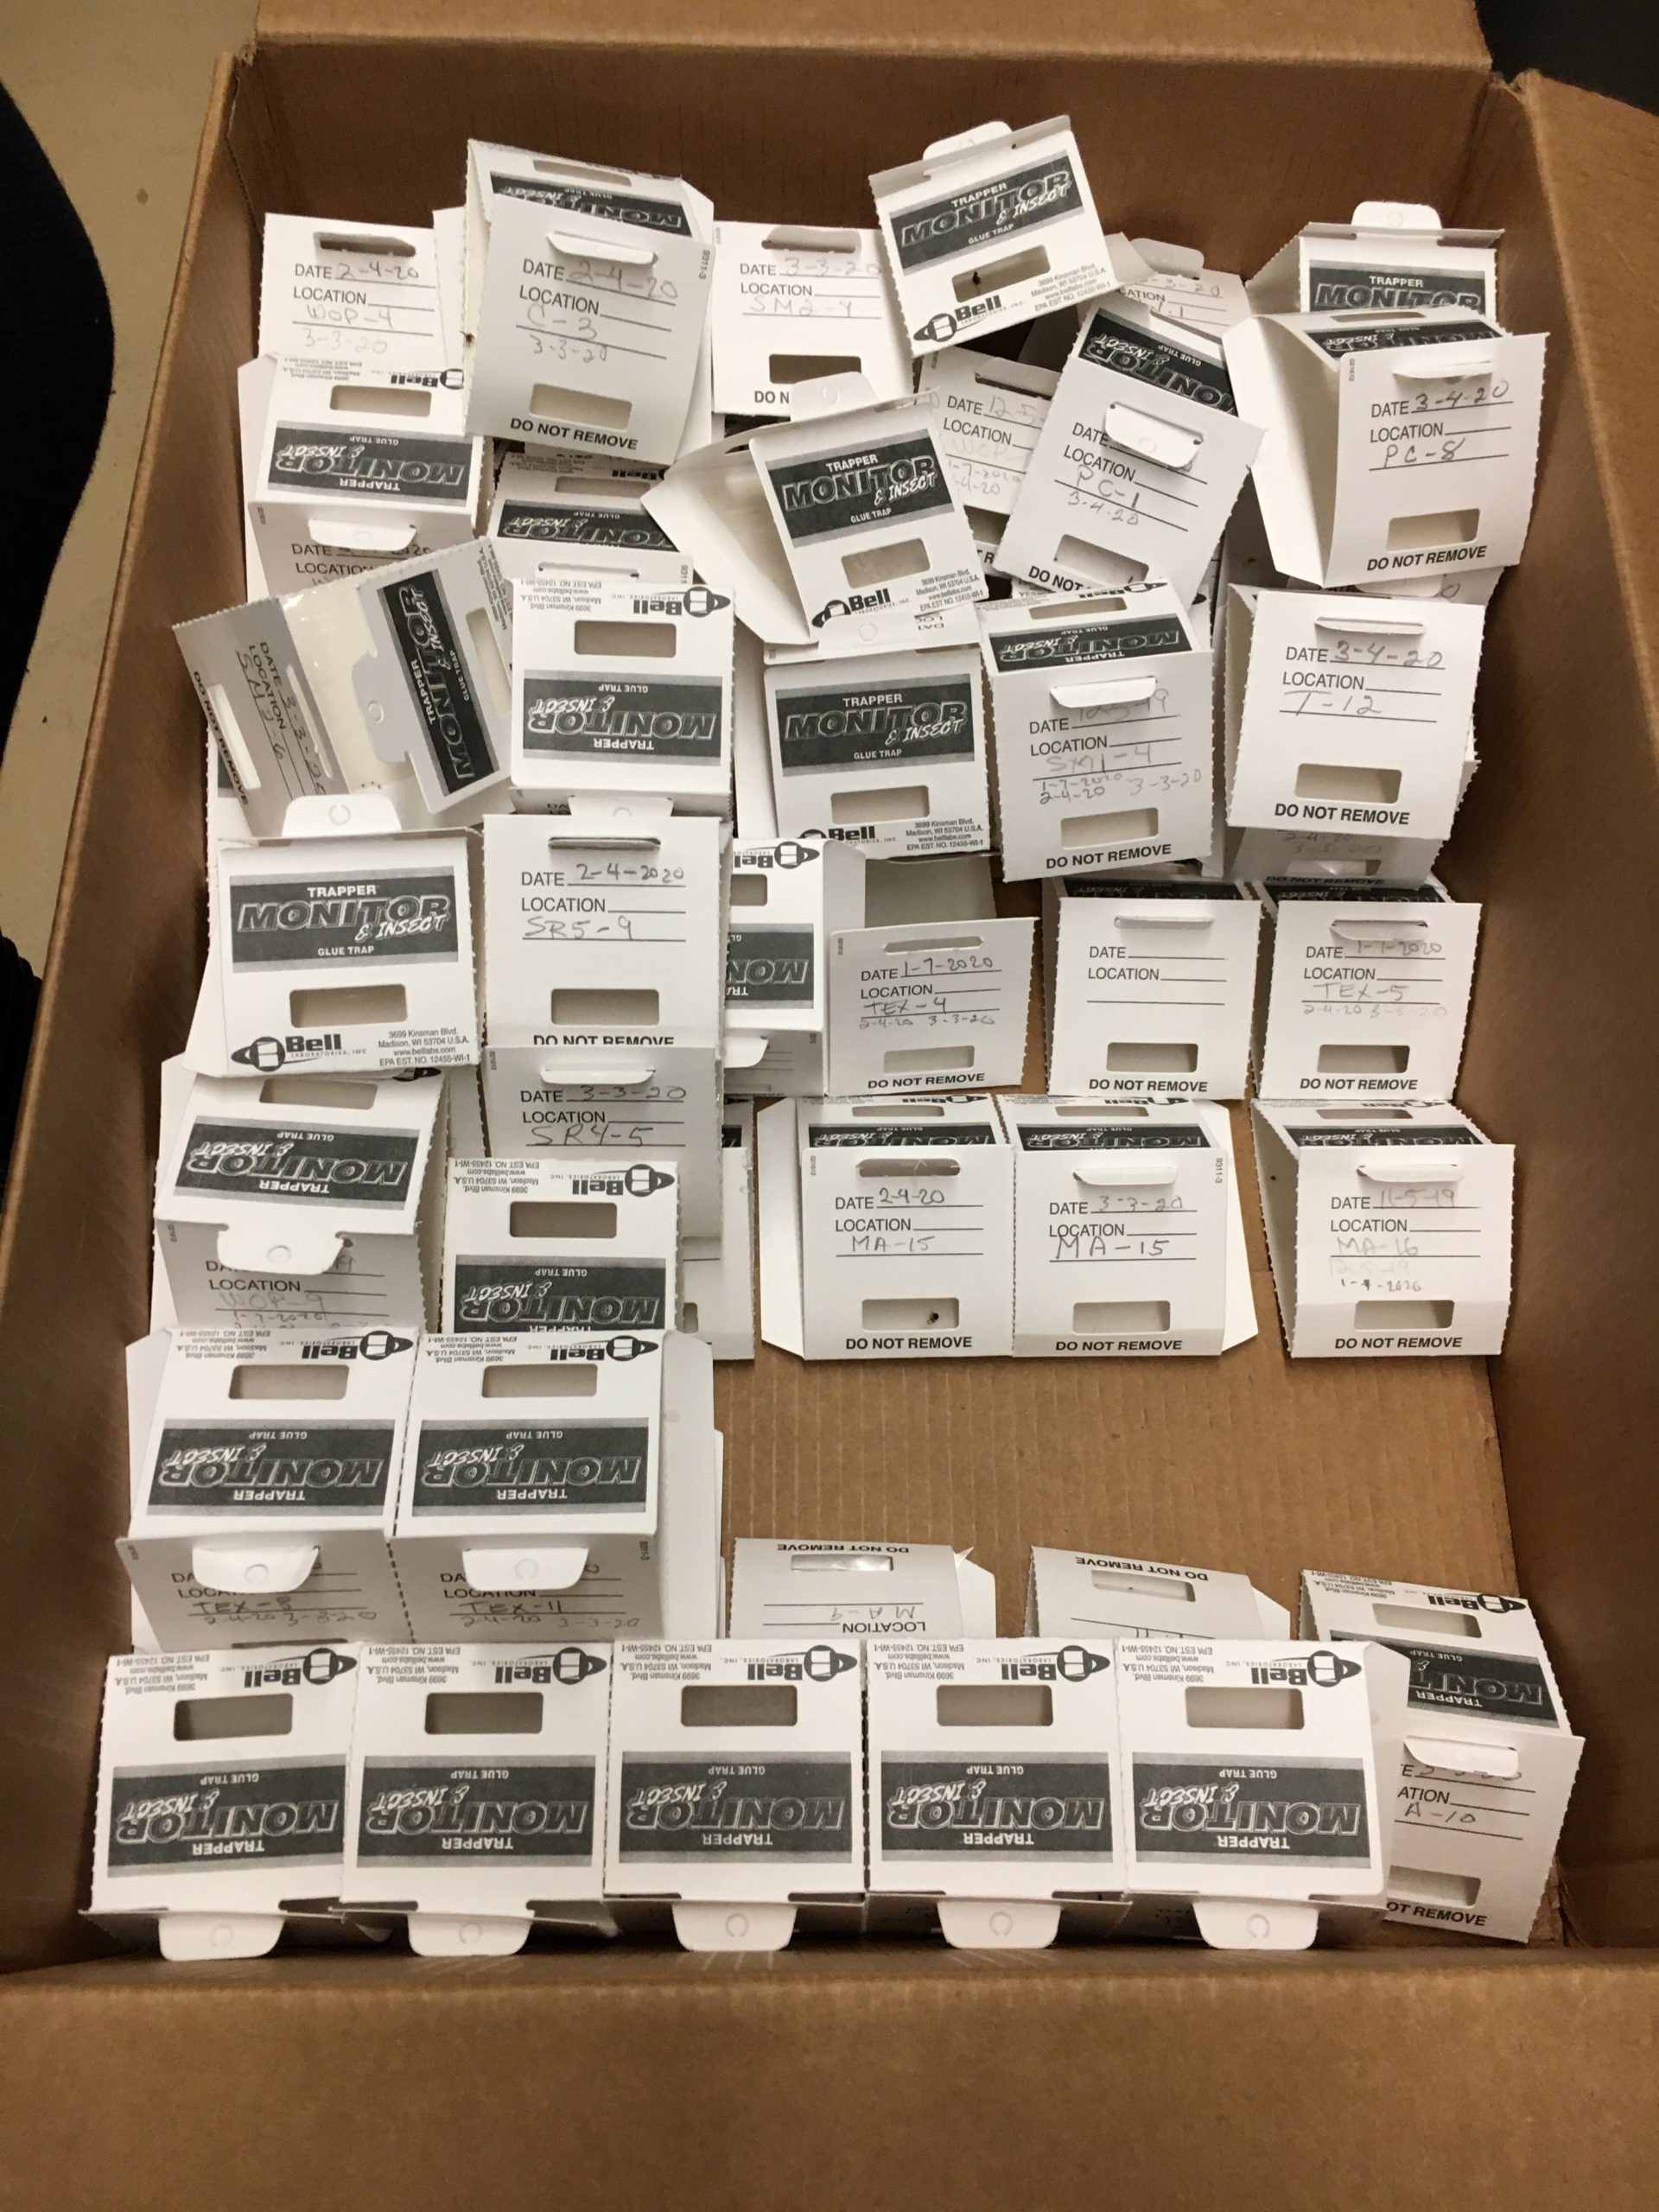
Some supplies that are useful when checking monitor traps.
SWEEP AND REPLACE CHECKING
Depending on your trap layout and staffing numbers, you may consider the sweep and replace checking strategy:
- Collect all traps that have captures and replace them with new traps
- Identify pests from each trap after all traps have been picked up.
- Traps without any captures can be left to use for another period, unless they are dirty/dusty, ruined by heat, or collapsed.
Note: This method will be a greater investment in monitor traps (and pheromones if used), but you can justify that expenditure with a possible reduced labor cost.
This workflow can be delegated to multiple staff by separating the work of pest identification from trap collection. For example, maintenance assistants, techs or interns can be trained to remove and replace the traps in their work area. In this scenario, the accuracy of placement against the wall and correct labeling of the traps must be stressed. Once all traps are collected, the IPM Coordinator or Representative can then move the traps to a microscope for identification and recording.
Some people record the identity and quantity of pests as they identify them. Another option is to note the number of each type of insect on a notepad or on the flap of the trap with the trap number written on it. This notebook or trap flaps can then be taken to a computer for data entry.
IN SITU CHECKING
The in-situ checking strategy can be a good fit depending on staff time and skills. This procedure entails assessing traps in their locations on a regular schedule and only replacing traps as needed. During each scheduled check, new captures on the trap are dotted with a marker to mark them as having been counted. Each capture is recorded on paper or directly into a database. Traps may be replaced if they need to be removed from the space for further identification or discarded if they are full, dirty, or damaged.
In this strategy it is critical that the pests can be accurately identified in-situ. This requires fully opening traps and looking in good light, and may require use of a flashlight. Some captures may be identified easily with the naked eye or a loupe, others take more practice or require serious identification with a microscope and supporting resources. This might be done by the person checking the traps or handed off to a different colleague with more expertise. In this case, the trap will be removed from its location and replaced with a new trap. If you are unable to identify a pest on one of your traps, you can always photograph it and send in to the Museum Pests listserv.
Ultimately all trap data needs to be recorded in the manner consistent with the data collection needs of the institution.
Monitoring an Active Infestation
There are times when one will discover that there is an active infestation in their space that is more than base level pest activity. When it is clear what object(s) and pest(s) are the specific problem then immediate actions can be taken based on recommendations in Solutions. For a broad outline of tasks see Dealing With An Active Infestation. However, if you are suddenly finding problem pests in elevated numbers in a space but do not know where they are coming from, an infestation monitoring strategy can be deployed. It is common in this instance to either ramp up an existing monitoring program or start an entirely new monitoring strategy that will need to rapidly adapt to pinpoint the source(s) of the infestation.
Monitoring an active infestation to pinpoint the source so solutions can be deployed requires a more fluid and adaptable approach of standard monitoring. While in most monitoring scenarios traps are set down in a pattern to maximize chance of pests blundering into a trap, this is generally not sufficient when there is an active problem. During this time period expect to check traps very frequently, add temporary traps, and even move temporary traps to new locations.
If there are no traps in the infested space, deploy blunder traps in the area the pests were last seen, next to entrances, and in a grid pattern throughout the space. If your pest responds to pheromone lures, now is the time to use them! While they are more expensive than blunder traps, they actively attract pests and will give you much better and more reliable information on their location and concentration. Pheromone lures should not be placed near entrances; for more tips on placing pheromone lures, see Pheromone Tips. Not sure which trap is right for you? See Monitor Trap Selection. If you have existing traps in the space, begin by looking at the information you have gathered from them:
- When did pest numbers start to increase, and in which locations?
- Is this a new pest, or one you have seen in the past?
Research your pest if it’s unfamiliar to you – learn about its life cycle, find out what conditions it likes, what food it eats, and where it lives. Spend time in the area(s) of your highest captures and try to determine what might be drawing the pests in or keeping them around. Check for food sources, points of ingress, and places to hide. It’s important to inspect the area thoroughly, including around, under, over, and inside cabinets, boxes, fixtures, etc. to the extent possible. If there’s no obvious source, deploy additional traps, focusing on the area around your highest captures first. Check all of your traps daily – the more often you check them, the more useful the data you gather will be. As you learn more, focus your search by moving traps with no activity to areas with higher activity. After pinpointing an area of infestation with traps, make a visual inspection to locate the specific source.